Paste an Image from Clipboard in JavaFX

This post is part of the 100 Days of JavaFX Series.
In this guide, we will see how to paste an image into a view in JavaFX.
We will be covering some UI basics, the use of keyboard shortcuts and how to read from the clipboard.
Quick intro to JavaFX CSS
In JavaFX when you want to style an element you mainly have two options:
- Use the corresponding Java method
- Use CSS (with javafx specific properties)
Label l = new Label("Paste your image here!");

// Style using Java methods
l.setTextFill(Color.valueOf("#2c5282"));
l.setFont(Font.font(20));

// Style using CSS
l.setStyle("-fx-text-fill: #2c5282; -fx-font-size: 20;")
In general I recommend using CSS. If you need some value to be more dynamic, you always use the regular Java methods for those. CSS will also allow us to use classes and a separate .css file like we are already used to for the web.
Present the basic scene and how it’s built
What you start with: The Stage
When dealing with a JavaFX application you will see these two classes: Stage an Scene
The Stage will represent the window of your application. To that Stage you will attach a Scene, which contains a tree of UI elements.
- Stage → the window
- Scene → UI content of the window
Why do we set the size on the scene and not the window?
When you start a JavaFX application, the initial Stage (or window) is provided to you:
public class MyApp extends Application {
    @Override
    public void start(Stage stage) {
      // Do awesome stuff here
    }
}
What you will build: The Scene
Stage / Scene is a theatre metaphor. You are provided with a stage by the theatre and you are given the chance to express yourself in a scene.
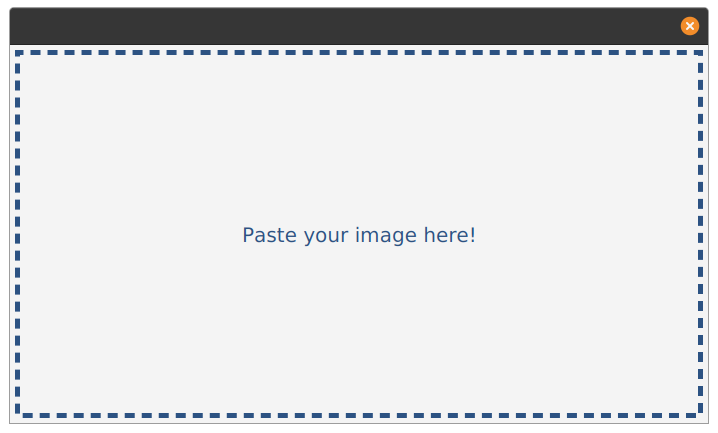
To achieve this result we are setting up the following UI Component Tree:
- Scene - our scene that we attach to the window (stage)
- StackPane - a container that stacks elements on top of each other
- Label - a simple way to display some text
@Override
public void start(Stage stage) {
    Label l = new Label("Paste your image here!");
    l.setStyle("-fx-text-fill: #2c5282;" +
            "-fx-font-size: 20;");

    StackPane pane = new StackPane(l);
    pane.setStyle("-fx-border-color: #2c5282; " +
            "-fx-border-width: 5;" +
            "-fx-border-style: dashed;" +
            "-fx-border-insets: 5;" +
            "-fx-padding: 5");

    // If you don't provide a prefered size, the window will as small as it needs
    // to be to display its content.
    // This will be the initial size of the wiodow, it is then up to the user to resize
    // or maximize it.
    Scene scene = new Scene(pane, 640, 480);
    stage.setScene(scene);
    stage.show();
}
The units in JavaFX are in pixels, this the unit of the coordinates system. You don’t have to worry HiDPI, the scaling will be done for you. If using non vector graphics (SVG for examples), you may want to consider high resolution images to account for the users with HiDPI scaling on.
Handle keyboard shortcut
Without having a menu bar, the easier way to listen to keyboard events is to add a KEY_PRESSED event listener on the scene.
We will make use of KeyCodeCombination to describe the keys of our keyboard shortcut, instead of trying to manually match which keys are being pressed.
KeyCodeCombination pastKeyCombination = new KeyCodeCombination(KeyCode.V, KeyCombination.SHORTCUT_DOWN);
scene.addEventHandler(KeyEvent.KEY_PRESSED, keyEvent -> {
    if(pastKeyCombination.match(keyEvent)) {
        System.out.println("They see me pastin', they hatin'");
    }
});
Pro-tip: Use KeyCombination.SHORTCUT_DOWN instead to automatically use the shortcut key used by your system (Ctrl on Windows, Cmd on Mac).
Read content of the clipboard
Now that we can trigger something upon a keyboard shortcut being activated, let’s try to read the content of the clipboard.
Getting an image from the Clipboard is as simple as: Clipboard.getSystemClipboard().getImage(). However, check that the value is not null. If no image is found in the clipboard, this will be null.
Image image = Clipboard.getSystemClipboard().getImage()
If there is no content → image will be null
If there is an image → if there is an image, an instance
private void pasteImageFromClipBoard() {
    Image image = Clipboard.getSystemClipboard().getImage();
    if (image != null)
    {
        // Do something with the image
    }
}
Display it
To display the image, we will replace our label, with the image.
It’s good to have smaller method that do something more specific. In that case we are introducing a pasteImageFromClipBoard. This method will need to access some UI elements. You can turn those elements to attributes that can be reused in different methods.
You’ll need to use an ImageView in order to display an Image.
private void pasteImageFromClipBoard() {
    Image image = Clipboard.getSystemClipboard().getImage();
    if (image != null)
    {
        ImageView imageView = new ImageView();
        imageView.setImage(image);
        pane.getChildren().add(imageView);
    }
}
In this tutorial we don’t go deep on UI layout, so we are simply slapping the image view on top on the label by adding it to the StackPane.
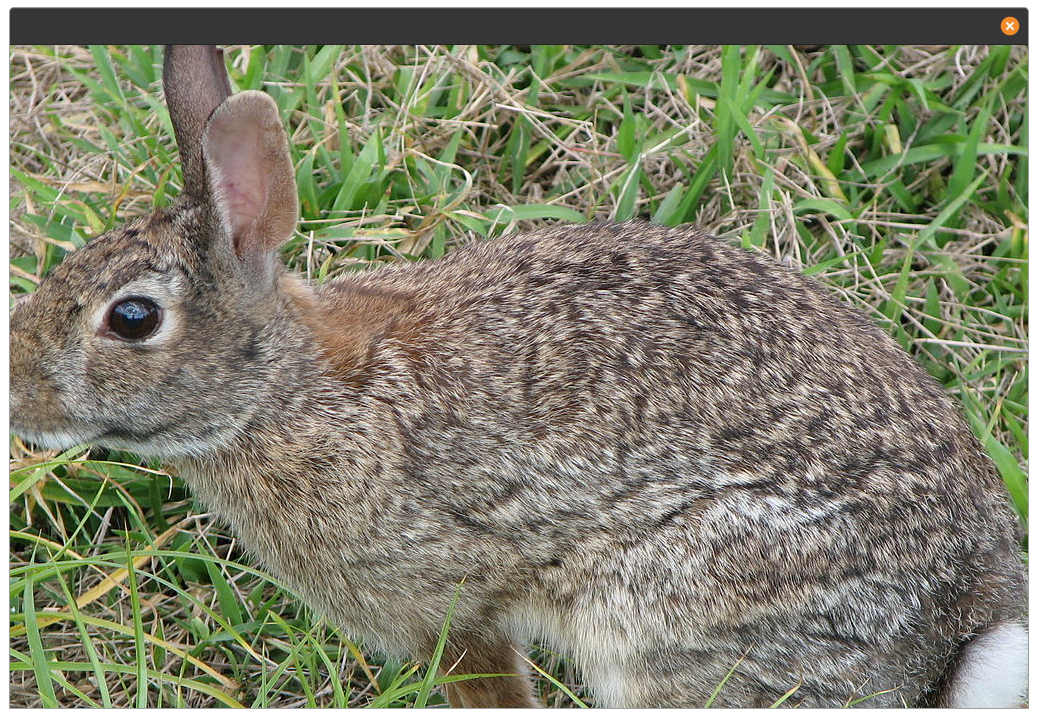
Image sizing is a bit off and needs tweaking. But we have successfully pasted a picture of a rabbit!
Conclusion
JavaFX provides as an easy an convient way to work with the clipboard. Reading at the documentation of the Clipboard class gives of interesting information about how the clipboard works in general.
KeyCodeCombination is also an good way to describe keyboard shortcuts and aleviates much of the complexity of figuring out which combination of keys is being pressed.
The full code can be found on GitHub in the 100 Days of JavaFX repository.